Making Reusable Cloth Pads & Liners!

Cloth Liners First Attempts

Hello There!! Sorry AGAIN that I haven’t posted for a bit. I’ve been working super hard on this project and it’s been taking a lot longer than I originally thought. I wasn’t going to post anything about these but its taking so long I wouldn’t have any blog content for this week if I didn’t. So here!, read all about my periods if you wish to. If you don’t want to I hope to have another blog post up around Wednesday.

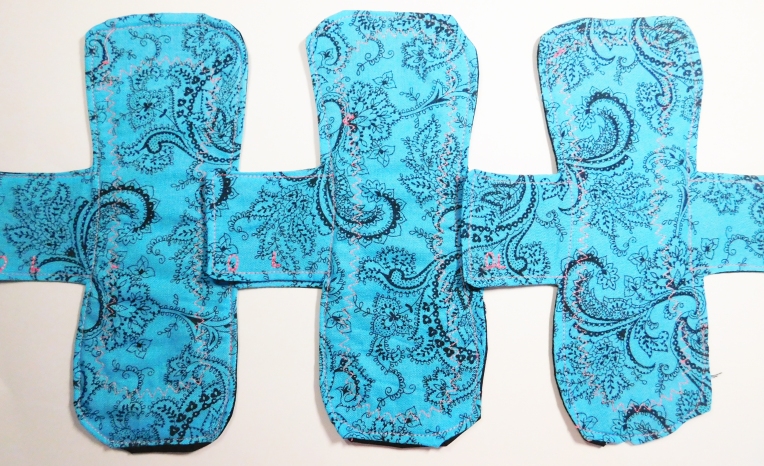
These shoddily sewn blue thingys are cloth panty liners. Basically the same as a regular plastic liner, except they are made out of fabric and you wash them instead of throwing them away. I am currently in the process of making cloth period pads too but they aren’t finished. I’ve been debating whether or not to switch over to cloth for years now and finally decided to take the plunge this week and make some. I came across them a few years ago in an article claiming that they could make your period less painful. I very seriously doubt that they could, but I loved the idea of them. I decided to make the switch recently because my periods are pretty much hell and I’m willing to try anything that will make them a little more comfortable.

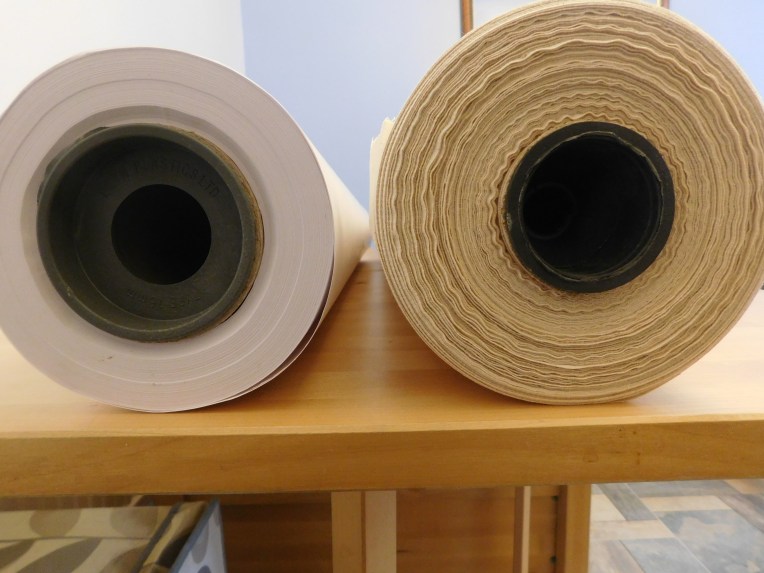
I opted to make my pads instead of buying them new because I’m broke, basically. I just bought myself a £700 sewing machine for my 20th birthday so I can’t justify spending £150 on cloth pads right now.I’ve mostly used spare/ upcycled fabrics to make them.  I raided my wardrobe for old leggings, pyjamas and hoodies… basically anything made out of cotton or viscose. The only fabrics I purchased to make my pads are PUL (a waterproof breathable lining fabric) and some Zorb, which is absorbent, hence the name. These came to a total of £30 and I’m expecting to get around 25 pads out of them which is pretty great.

reusable pad core

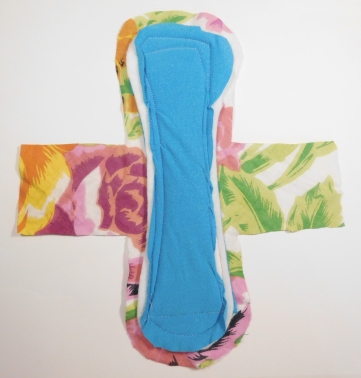
I am not proud of the stitching on these at all. I’ve been kind of rushing them in hopes of getting them finished before my next cycle so they look awful. That blue stretchy viscose I was using in the core of my pad was horrific to sew with. I’m glad it’s going to be hidden. I keep telling myself it doesn’t matter because they are only going in my knickers and nobody will see them, but it kinda does matter. I want to sew professionally one day so I should probably treat this as more of a learning experience.


Now, I’m fully aware that this may seem gross to you but calm down babe, it’s not that disgusting. Cloth pads are actually more natural and sanitary than disposable ones, they are much less likely to irritate your girly bits and are a lot more comfortable to wear. It’s more eco-friendly too! It just seems like the more sensible option in every way. I know this may not be the general opinion though.  I was watching a youtube video about how to make these and one of the comments was “How can she talk about this with no shame.” It pisses me off so much when people are rude like this, let me give you a list of reasons why:

  1. Periods are 10000% natural. They are as natural as sleeping and eating. It’s about time we accepted the fact that we have them and stop treating it like a dirty secret.
  2. If you are making fun of someone washing a pad instead of throwing it away, consider the effect that your “disgusting” thrown away pads are having in landfill right now. They’ll be there for about 1000 years.
  3. I also get the impression that this kind of thing is seen as an extreme way to save money, and people are ridiculed for it? I have no time for anyone who laughs at someone for not being able to afford something. It’s not primary school any more hun.
  4. Not everyone has a great experience with disposables. Period pads can give you some nasty ingrown hairs if you shave down there, and I’m sure that anyone who has experienced pad rash before can tell you how awful it is.
  5. What someone does with their private parts is their own damn business anyway.

ANYWAY

It’s my 20th Birthday tomorrow, I’m going to see suicide squad with my boyf &  then we are going to go to McDonalds. I just figured out that if you order the veggie burger without sauce it’s vegan, so I’m just going to put some of their curry sauce on it. I’m also going to see if I can get Ryan to take some pictures of me wearing the skirt I made last week for a blog post, I’m also going to do one about what I got for my birthday 😀

See you soon! Byeeeee

Advertisement

Practising Things I Suck At: Darts! (tips for people that suck too)

Hello there! Today’s post is somewhat of a lazy make-shift post to hide the fact I’ve had a really unproductive week. It was productive in terms of my reading life, as I finished 4 books, but I haven’t been feeling great so I haven’t made anything. I’m in the process of making a shift dress, which has 4 lovely double pointed darts in them. So far I’ve only altered and cut out the pattern and I’ve been putting off making the thing because of said darts.

Darts are one of those things that I learned for the first time in college, everything in college is done to a deadline so I associate darts with pressure and disappointment. I remember trying them so many times until I was finally told that my wonky, bendy dart “would do.” When you study fashion you learn a weird mix of beginner pattern cutting and sewing, which is why it’s completely possible for me to a bit more comfortable with pattern cutting than with sewing, even though most people master the latter first. In our first week of pattern cutting we were taught how to manipulate a dart into a princess seam and ever since then I have literally never sewn a dart. I would just cut them out of every commercial pattern I did, and a year of sewing later I still can’t sew a dart. It’s embarrassing.

Two days ago I decided to face my fears and dedicate a whole day to practicing them. I cut up an old Betty Boop duvet cover (RIP Betty! </3) and practiced for a few hours. In the whole time, I probably sewed around 40 darts. They still kind of suck, but are definitely a big improvement. I found that after practicing my darts were straighter, flatter at the point, and started and ended where they were supposed to.  I thought I’d share some pictures on here and share a couple of things I learned as a complete beginner.

LOUISE ALICE JAY DARTS START AT POINT

  • Firstly, I learned that I definitely prefer to start sewing at the point of the dart. You kind of have to with double-pointed darts, but with the regular kind they encourage you to start from the raw edge. I practiced both ways but I found that, although my dart aim was eventually quite good, I would still overshoot around 10% of the time no matter how much I practiced if I started at the raw edge.
  • I found that the best way to start sewing the dart is to put the needle right next to the fabric, just above the point, and then twist the hand wheel to get the needle to make a stitch right on the point. I’ve tried to show this in the image above. This usually gave me a dart that didn’t have a pucker at the end.LOUISE ALICE JAY AIM DART
  • In order to get a straight dart I found that you have to kind of aim your stitch line, and then once you start sewing commit to it 100%. Otherwise, the dart will turn out wonky. The best way to aim the dart is to line the end point of the dart up with the needle the best you can, and try to sew in a straight line. After realizing this and practicing it a few times my aim was pretty good. You really do have to have to have faith in your aim though, even if you think it isn’t going to meet the point keep going because it probably will if you’re sewing straight.
  • Instead of back- tacking at the point I learned that you should tie a double knot instead. Otherwise it can look bulky.
  • I still suck at double pointed darts, I’m not entirely sure what the center is supposed to look like. I know it’s not supposed to be a sharp turn but I struggle getting the curve in the exact place if I try to sew it more smoothly. I need a lot more practice with these, although I think that for now I’m good enough at them to make my dress.Here are some pictures of my progress. I am really am pretty happy at the moment and glad I sat down and gave them a try.  As you can see the first dart doesn’t even hit any of the points and is really wonky, but the last is smooth and hits the guidelines I drew perfectly. These are just a small selection of the ones that I sewed. I’m not ashamed to say it took a LOT of practice for me to get them right, they are something that I have always struggled with.

    louise alice jay dart progress

Here are some of the resources that I used to help me learn (contains affiliate links, read disclosure):

  • Alison Smith’s Couture Dressmaking Techniques class on Craftsy- Alison Smith is my pink-haired hero. This class is a little out of my depth but I would still recommend it to any beginner as her extensive expertise of sewing has been so helpful to me. It was with her advice that I tried sewing darts from the tip (which worked best for me) and the information about how to press darts beautifully will no doubt make my projects look so much better. The class is around £40 but wait for a sale (there is always a sale) and you can get it for £20 or less. You might be able to get the same information in her popular book, but I don’t own it, so don’t hold me to that.
  • Reader’s Digest Complete Guide to Sewing – It will become quickly evident on this blog that this is my favourite sewing book. This book has 5 very detailed pages all about sewing darts. It covers basic single point darts, double point contour darts, French darts and gives information about how to sew darts in underlined and interfaced garments. I have the old edition of this book, and you can usually get it on amazon second hand for a few pounds. I got mine for £1 at a boot sale.
  • The Singer Sewing book by Mary Picken– This has a little bit of information about the different placements of darts in garments that I haven’t seen anywhere else. The book was originally published in 1949, so I imagine that I haven’t seen this information before because these dart placements are only seen in vintage patterns. This book is super cheap so I recommend it anyway.

I hope that this post was helpful to anybody who also sucks at darts. I’m still very much a beginner at sewing so I might do a lot more of these posts. I think it’s helpful for me to list things that I have learned/ figured out as a beginner, it will help me do beginners tutorials when I am more advanced. Thanks for reading!

Pattern Cutting Supplies Haul

PATTERN ROLLS LOUISE ALICE JAY

Hellooo there, readers. Today we are going to be doing a haul, I only bought 3 things but 2 of them were pretty damn big (and pretty damn expensive). As you may know, if you’ve read my other posts, I’ve decided to teach myself pattern cutting and sewing. I started to learn them when I was studying fashion, and loved them, but hated fashion so I dropped out. I really don’t want to stop learning this though so I’ve invested hundreds in supplies, books & classes in hope that I can continue.

These purchases are from 3 different places. I will start off with the smallest purchase first.

LOUISE ALICE JAY FABRIC SCISSORS  I decided to replace my fabric scissors as my old ones just weren’t cutting well after around 4 years of regular use. I dropped them while I was in college and it made them a bit hard to cut with. Some of my friends didn’t notice a difference, but I definitely did. As well as that when I was in college lots of people used to borrow them and cut all kinds of things with them. These are my ride or die fabric scissors. They cost around £5 but they cut beautifully (if you look after them). My college tutors told me that they were as good as ones they had paid £40-£60 for. I got mine on amazon, and they are listed as (affiliate link) 240mm Stainless Steel Tailoring Scissors.  If you are in any way new to sewing, or just looking for a new pair I would DEFINITELY get these they are brilliant for the price.


My next purchase was this 150m roll of pattern cutting paper. I bought it from Home Crafts for £34.99. There are lots of shops online selling these rolls but I went for this one because it had the best price. I also chose this one because the dots & crosses are 2cm apart, whereas lots of others are 2.5cm apart. This means that I could use plain cm grid paper to make quarter scale patterns, and they would be really easy to scale it up onto this pattern paper. My only issue with it was the way it was packaged during delivery. It was only wrapped up in Kraft paper, and some of the paper on the top layer has holes in it. This isn’t too bad, and I can still use the top layers of paper, I just would have preferred it to be wrapped in Bubble Wrap. The delivery was really quick, though, I ordered it on Monday and received it on Wednesday.

My final purchase was this giant 50m roll of Calico from FabricUK . It was expensive, it cost £96 including delivery, but I plan to use it for a lot of things. Firstly if I’m going to be learning to pattern cut I’m going to be getting through this a lot when testing my patterns. I also want to use it to toile commercial patterns to make sure they fit. I also quite like the feel of calico, so I may even dye it and make clothes with it. I plan to get through a lot of this stuff and I think that although £96 seems a lot, this roll will last me years, and save me from wasting lots of other expensive fabric.

So that’s all for now. I may do another post on the resources I’m using to learn pattern cutting soon. If you are interested in learning more about pattern cutting please subscribe because I’m going to be posting a load of reviews of classes & books:D hope this post was helpful! x